Photo Review of Close Combat V
I found out Blogger hosts images [now?]. So I'm taking advantage of the free hosting.
The Close Combat series is one of my favorite franchises in video games. The maker went bankrupt after CCV (which is actually Close Combat: Invasion Normandy (not V), but that's what I call it since the others are all numbered) which was released in 2001 (I think). In the most basic description, it's a RTS game set in WWII environments. CC1 was set on the beaches of Normandy. Close Combat II was set in the Netherlands during Operation Market Garden; you can play as either the Germans or the Allies (Americans, Britons, and Poles in different sectors). CC3 encompassed the entire Russian Front; CC4 was set during the Battle of the Bulge. Close Combat V is once again set in Normandy.
The game is tremendously different than the standard RTS game, however (think Age of Empires). Instead of using hit points and attack values to basically turn the battles into math-slugfests, the game takes a more realistic approach. Everything from ammo and penetration to realistic line-of-sight to morale and fatigue is modeled. If you order your soldiers to charge a maching gun, they'll call you crazy and stay put. If they come under fire, some may flee, while others will get pinned down and cower. Send a tank through a hedgerow that enemy soldiers are hiding behind and it'll crush some and send the rest running (at which the bow-MG can mow them down). Tell your soldiers to run a long distance and they'll be too tired to fight by the time they get there. Send a Sherman tank against a JagdPanther in a head-to-head fight and watch the Sherman get blown up while the Sherman's round plink off the German tank's armor.
 And so it is to this illustrious tradition that CCV was added. I want to get out of the way right now that the AI wasn't great; but setting the difficulty up to a high level would make for a very interesting strategic fight.
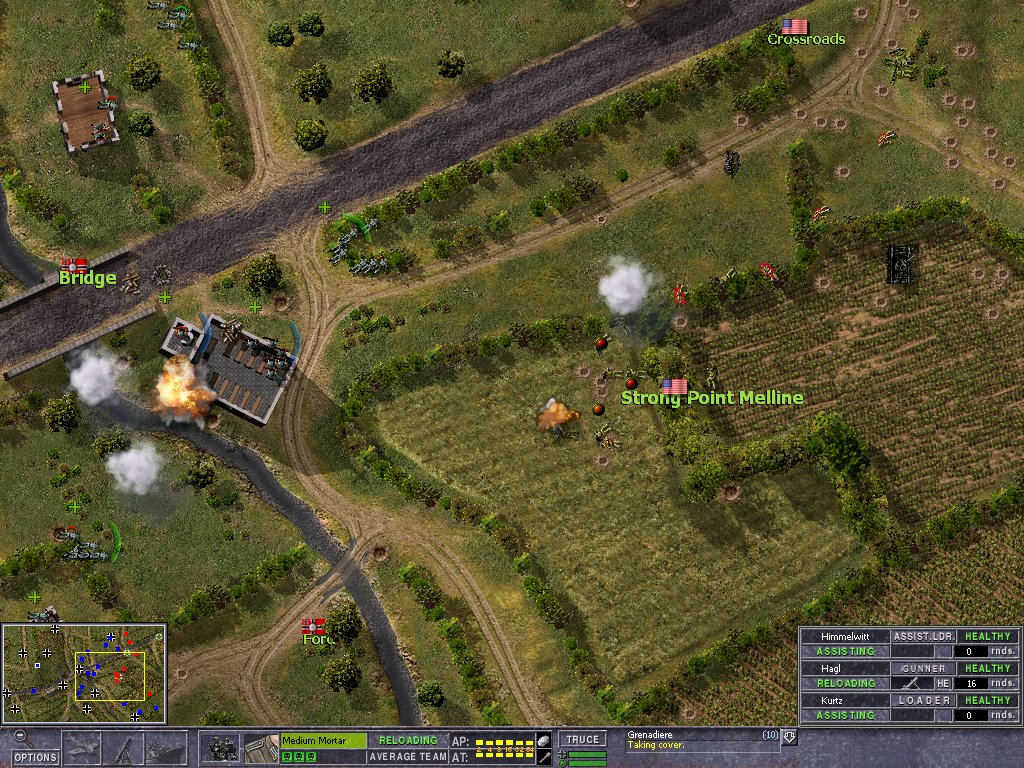
In the picture to the left, a number of things are happening. A German rifle team is occupying the base floor of the church in the middle of the picture, while a sniper is in the bell tower with a view of the whole field. Around them are a number of supporting teams to prevent the Americans from flanking the church, the strongpoint of the defense. On the minimap, you can see the blue dots, representing the Germans, have got the Americans in a very difficult spot. The Americans are trying to break out through the center and on the right wing, but both attempts are failing (the bloody bodies in the middle of the picture are an example of that. The puffs of white smoke were put down by American mortars to try to mask the movements of the rifle teams from the German machine guns and sniper, and were relatively successful. The fiery explosion near the church is from an off-map American mortar team trying to pin the church defenders so the attackers can assualt; however, the German mortar fire (explosion in the field) is pinning down the attackers as well.
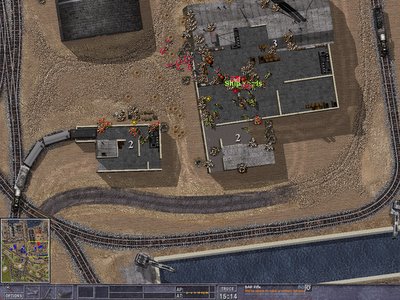 In this picture, the Americans have led a semi-successful assualt on a German-held warehouse in Cherbourg. The warehouse was the source of heavy MG fire that was inflicting heavy casualties on American soldiers in the offices across the tracks, so a few dozen soldiers were sent to flank the nest and destroy it. They got to the train house before they were spotted, and then the MG opened up on them. Even with mortar support and suppressing fire, they took a half-dozen casualties before being able to move into the warehouse. In there, they ran into unexpected resistance protecting the MG team, and a firefight ensued. A few lucky grenade tosses killed the commander of the German rifle team (along with a few other soldiers) and the remaining soldiers fell back. This picture was taken as the Americans were trying to assualt the MG, which by now had turned to face them and was presenting a tremendous problem. It was eventually taken, but the operation resulted in a dozen total casualties for the Americans; quite high.
Hopefully the pictures provided an idea of the gritty nature of the games. Even easy victores have tense moments, such as when a squad charges an enemy team in a building and engages in bayonet fighting. Will a lucky enemy grenade kill half the team? What if the enemy has a flamethrower? How long can I let the tank firing in support go before it begins to endanger my own troops? These decisions are a dozen a minute. The unpredictability of the game is what makes it great. In AoE, a cavalier will always kill an archer. In CC, a tank will sometimes kill the bazooka, but the bazooka will sometimes kill the tank. And nothing is more frustrating than the incompetent AT gunner who has had two clear shots at close range at the flank of an enemy tank and misses both times, prompting the tank to turn towards the gun and blast the crew into oblivion.
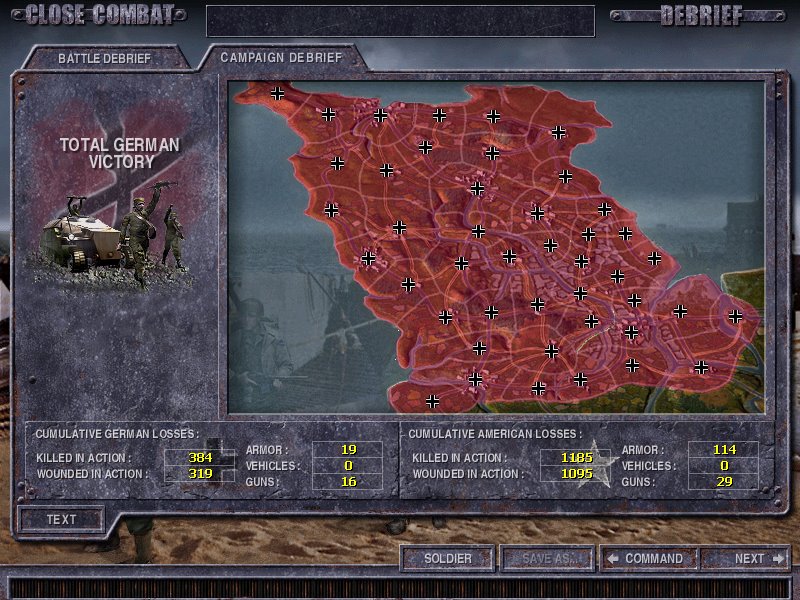
This is the victory screen. Guess which side I was.

The Close Combat series is one of my favorite franchises in video games. The maker went bankrupt after CCV (which is actually Close Combat: Invasion Normandy (not V), but that's what I call it since the others are all numbered) which was released in 2001 (I think). In the most basic description, it's a RTS game set in WWII environments. CC1 was set on the beaches of Normandy. Close Combat II was set in the Netherlands during Operation Market Garden; you can play as either the Germans or the Allies (Americans, Britons, and Poles in different sectors). CC3 encompassed the entire Russian Front; CC4 was set during the Battle of the Bulge. Close Combat V is once again set in Normandy.
The game is tremendously different than the standard RTS game, however (think Age of Empires). Instead of using hit points and attack values to basically turn the battles into math-slugfests, the game takes a more realistic approach. Everything from ammo and penetration to realistic line-of-sight to morale and fatigue is modeled. If you order your soldiers to charge a maching gun, they'll call you crazy and stay put. If they come under fire, some may flee, while others will get pinned down and cower. Send a tank through a hedgerow that enemy soldiers are hiding behind and it'll crush some and send the rest running (at which the bow-MG can mow them down). Tell your soldiers to run a long distance and they'll be too tired to fight by the time they get there. Send a Sherman tank against a JagdPanther in a head-to-head fight and watch the Sherman get blown up while the Sherman's round plink off the German tank's armor.
 And so it is to this illustrious tradition that CCV was added. I want to get out of the way right now that the AI wasn't great; but setting the difficulty up to a high level would make for a very interesting strategic fight.
In the picture to the left, a number of things are happening. A German rifle team is occupying the base floor of the church in the middle of the picture, while a sniper is in the bell tower with a view of the whole field. Around them are a number of supporting teams to prevent the Americans from flanking the church, the strongpoint of the defense. On the minimap, you can see the blue dots, representing the Germans, have got the Americans in a very difficult spot. The Americans are trying to break out through the center and on the right wing, but both attempts are failing (the bloody bodies in the middle of the picture are an example of that. The puffs of white smoke were put down by American mortars to try to mask the movements of the rifle teams from the German machine guns and sniper, and were relatively successful. The fiery explosion near the church is from an off-map American mortar team trying to pin the church defenders so the attackers can assualt; however, the German mortar fire (explosion in the field) is pinning down the attackers as well.
 In this picture, the Americans have led a semi-successful assualt on a German-held warehouse in Cherbourg. The warehouse was the source of heavy MG fire that was inflicting heavy casualties on American soldiers in the offices across the tracks, so a few dozen soldiers were sent to flank the nest and destroy it. They got to the train house before they were spotted, and then the MG opened up on them. Even with mortar support and suppressing fire, they took a half-dozen casualties before being able to move into the warehouse. In there, they ran into unexpected resistance protecting the MG team, and a firefight ensued. A few lucky grenade tosses killed the commander of the German rifle team (along with a few other soldiers) and the remaining soldiers fell back. This picture was taken as the Americans were trying to assualt the MG, which by now had turned to face them and was presenting a tremendous problem. It was eventually taken, but the operation resulted in a dozen total casualties for the Americans; quite high.
Hopefully the pictures provided an idea of the gritty nature of the games. Even easy victores have tense moments, such as when a squad charges an enemy team in a building and engages in bayonet fighting. Will a lucky enemy grenade kill half the team? What if the enemy has a flamethrower? How long can I let the tank firing in support go before it begins to endanger my own troops? These decisions are a dozen a minute. The unpredictability of the game is what makes it great. In AoE, a cavalier will always kill an archer. In CC, a tank will sometimes kill the bazooka, but the bazooka will sometimes kill the tank. And nothing is more frustrating than the incompetent AT gunner who has had two clear shots at close range at the flank of an enemy tank and misses both times, prompting the tank to turn towards the gun and blast the crew into oblivion.
This is the victory screen. Guess which side I was.
posted by Jimmy at 8:00 PM
![]()

0 Comments:
Post a Comment
<< Home